From paper to project
Print at 100 % and check the 20 mm square.
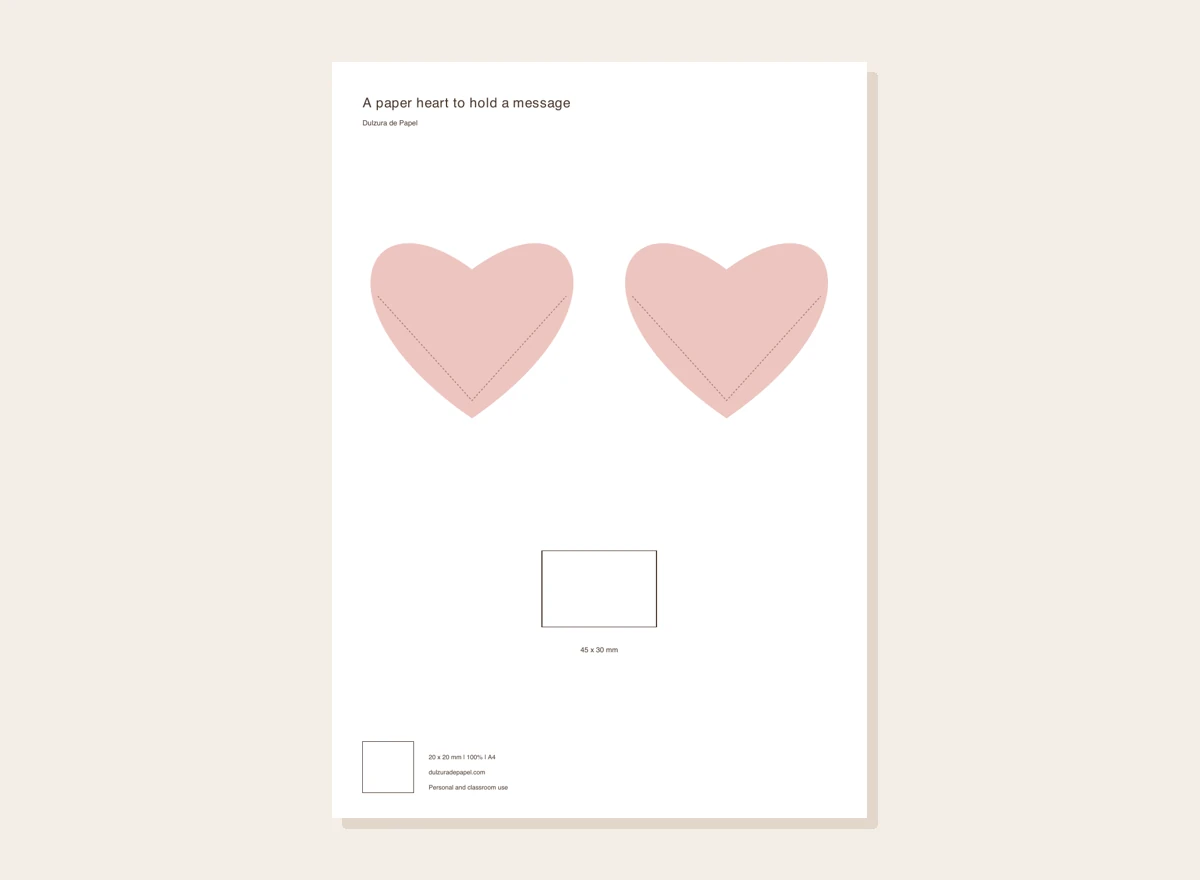
Cut both complete hearts and the rectangular note, preserving the upper lobes.
Write the note and let its ink dry before assembling.
Apply a thin glue line inside the marked side and lower-point margins of one heart. Leave both upper lobes unglued.
Align the second heart on top and press as directed by the adhesive.
When dry, slide the note in from above. If it resists, remove it rather than forcing the paper or adding glue inside.
Check it with an example
The note is 45 × 30 mm. Folding once reduces its height to 15 mm; test before gluing. “Thank you for being there” works better than a lengthy message in tiny writing.
If it does not turn out as expected
Excess glue can seal or buckle the pocket. Do not fill it with confetti or small pieces. For the folded model cited in the source post, consult its designer through the provenance links; these are different methods.
Your template, ready to print
Original design. Match your printer’s paper size and keep the scale at 100 %.
Cut the heart outline. The dashed line marks the glue margin, not a fold. Calibration square: 20 × 20 mm. Personal and classroom use; do not resell the file.
Where this idea comes from
This project revisits a Dulzura de Papel topic with instructions and original graphics developed for this version. Origami mensaje corazon - Blog Dulzura de papel · 12 July 2015.