From paper to project
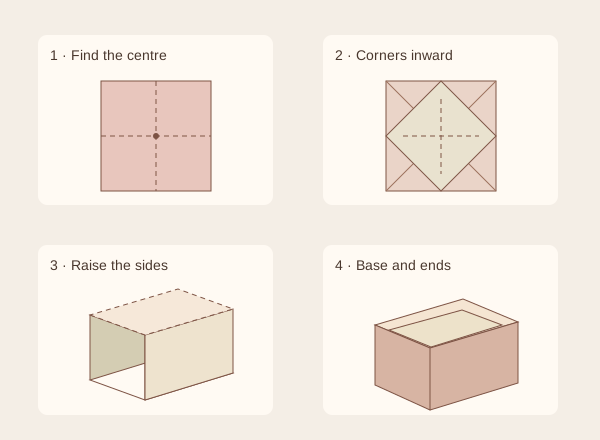
Mark horizontal and vertical halves; unfold.
Bring all four corners to the centre.
Fold two opposite edges inward; reopen those folds.
Open the corresponding two points, leaving the others folded.
Mark inward sides and diagonals at each end.
Raise the sides, collapse the diagonals and fold both points inside.
Settle the base. A lid needs a slightly larger square: test its fit.
Check it with an example
Ideal geometry gives a 20 cm square a base of roughly 7.1 cm and height of 3.5 cm. Paper thickness changes the fit: these figures do not replace a physical trial.
If it does not turn out as expected
If a side collapses, check the diagonal folds. A paper box is not a container for liquids or unwrapped food.
Where this idea comes from
This project revisits a Dulzura de Papel topic with instructions and original graphics developed for this version. Origami Caja de Papel - Blog Dulzura de papel · 12 July 2015.
The model and its folds
Masu is a traditional model. See also the full folding sequence at Origami-Fun. Our original diagram summarises stages and does not reproduce tutorial images.