From paper to project
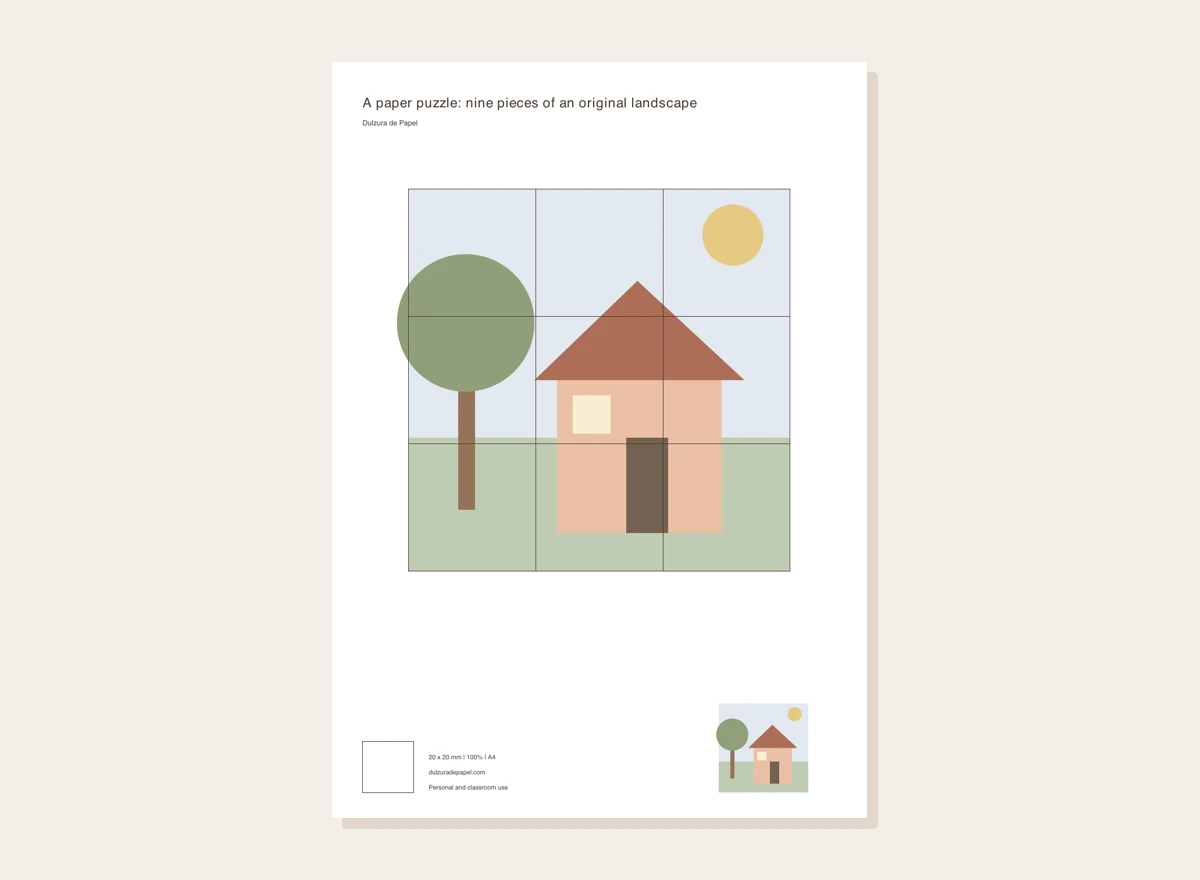
Print at 100 % and measure the 20 mm square. The main picture is 150 × 150 mm.
Before cutting, inspect the reference: sky above, a tree at one side and a house lower down.
Cut out the main square, then follow two vertical and two horizontal lines to make nine pieces.
Keep the reference thumbnail intact. Shuffle the pieces on a clear table with suitable supervision.
Start with corners and look for landscape lines continuing into the next piece. Check rotations as well as colours.
Keep the nine pieces and reference together. Mark the backs with a different symbol if making several sets.
Check it with an example
A sky piece containing part of the tree belongs near the top, but must rotate until the tree edge continues into its neighbour. The picture gives position clues beyond colour.
If it does not turn out as expected
If a cutting mistake creates a small fragment, print a replacement rather than adding loose scraps. This is not a certified toy or an unsupervised activity; avoid paper pieces with children who put them in their mouths.
Your template, ready to print
Original design. Match your printer’s paper size and keep the scale at 100 %.
Cut the outlines of the pieces; leave artwork and writing lines inside. Calibration square: 20 × 20 mm. Personal and classroom use; do not resell the file.
Where this idea comes from
This project revisits a Dulzura de Papel topic with instructions and original graphics developed for this version. Rompecabezas imprimibles Inside Out.