From paper to project
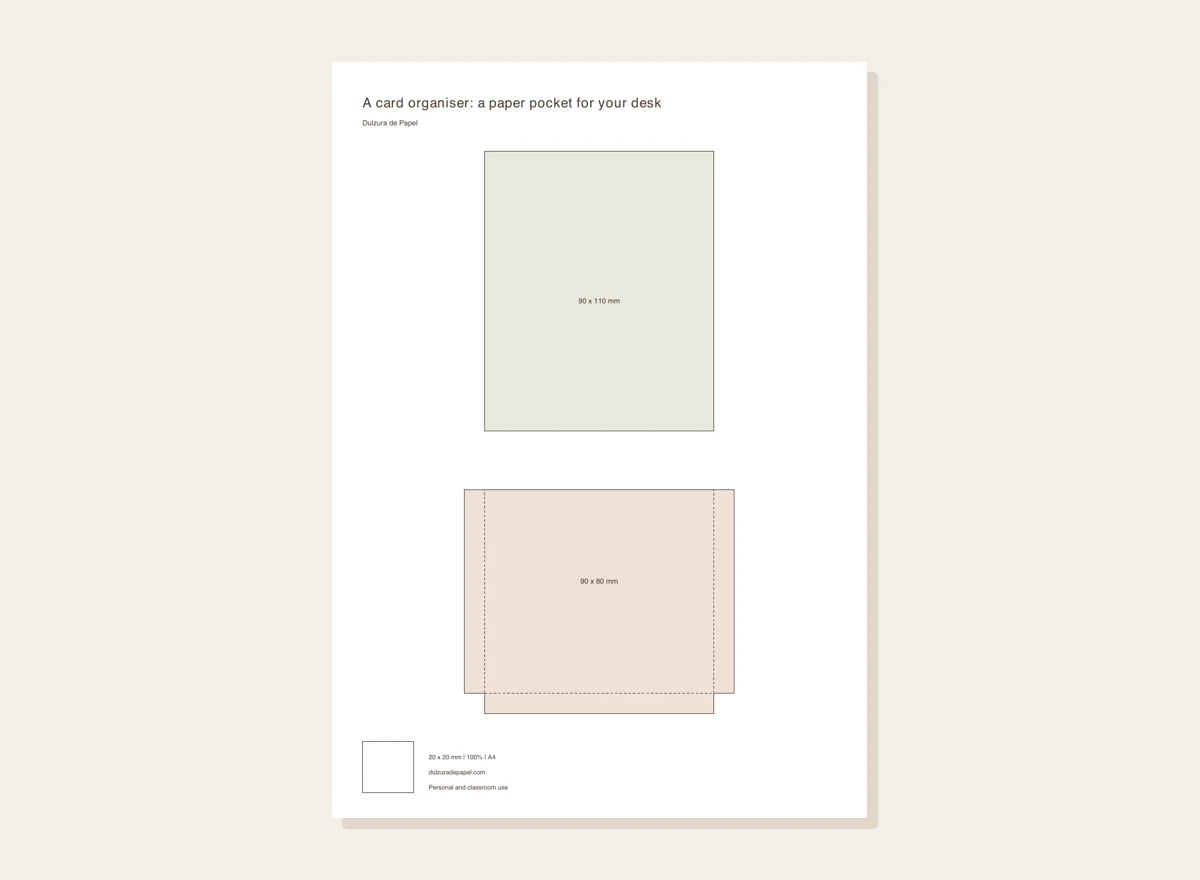
Print at 100 % and check the 20 mm square.
Cut the outer outline and tabs. Do not cut the dashed front-panel folds.
Score gently with a ruler and blunt tool without piercing the card.
Fold tabs inward. Place the front against the back without glue and check that the top edges stay open.
Use a little glue on the three tabs, close the front and dry beneath a protective sheet. Keep the top opening free.
Insert a few 50 × 30 mm cards and write a category on the front. Rest the pocket in a box or attach it to a stable backing, not a screen.
Check it with an example
Make a “Blank” pocket and a “Ready” pocket. Before a party, move each completed tag into the second. Use two pockets if the stack becomes thick rather than forcing the first one.
If it does not turn out as expected
If cards catch on glue, let it dry fully or remake the pocket with less adhesive. The paper has no certified load capacity: keep it for lightweight pieces.
Your template, ready to print
Original design. Match your printer’s paper size and keep the scale at 100 %.
Outer outline: cut. Dashed lines: fold the tabs. Calibration square: 20 × 20 mm. Personal and classroom use; do not resell the file.
Where this idea comes from
This project revisits a Dulzura de Papel topic with instructions and original graphics developed for this version. Organizador de papelería - Blog Dulzura de papel · 20 January 2014.